Friday, October 16, 2009

Cranberry and Chocolate Chip Oatmeal Cookies

cookies


As the temperature gets cooler I instantly go into winter mode. I feel an urge to grab a blanket and snuggle in front of the TV with a cup of steaming coffee in my hands. Having forgotten what the sun looked like thanks to the rainy and cloudy weather for more than a week, my winter mode experience was intensified. I was automatically transported to that cozy and wonderful time where the cool weather forces you to stay inside not feeling guilty about reading your favorite book, catching up on your favorite shows or baking something yummy in the kitchen. Heaven. Then I hear my son sneeze. It's OK. Another sneeze. It is probably just allergies. Yet another sneeze. Hmmm. One day and a phone call from my son's school later, all that joyful winter sensation went away as fast as it had come. Two weeks and three sick family members later, all I can say is, "I am glad I baked while I could."

These cookies are chewy and delicious! Hope you enjoy them as we did!

Ingredients:

1/2 cup sugar
1/2 cup packed brown sugar
1/4 cup butter, softened
1/4 cup vegetable oil
1/2 teaspoon baking soda
1/2 teaspoon ground cinnamon
1/2 teaspoon vanilla
1/4 teaspoon baking powder
1/4 teaspoon salt
1 egg
1 1/2 cups old fashioned oats
1 cup all purpose flour
1 cup craisins
1 cup semi-sweet chocolate chips

Heat oven to 350˚. Mix all ingredients except oats, flour, craisins, and chocolate chips. Stir in oats, flour, craisins, and chocolate chips.
Drop dough by rounded tablespoonfuls about 2 inches apart onto cookie sheets lined with parchment paper. Bake until light brown (about 10 min). Make sure you don't overbake them so they don't lose their chewy consistency.

Friday, February 6, 2009

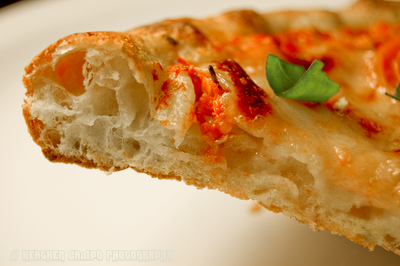
Pizza Science

Pizza Science

Did you ever think studying certain subjects was pointless? After all, they were going to be absolutely useless for you in the future, right? Like Science and Math, maybe? Well, you are in for a big surprise! Turns out they are not as useless as we thought.

As I got serious about making my own pizza, I started investigating recipes, ingredients, and dough and baking techniques. As I went deeper into the matter it surprised me to see the many variations that exist to make what I thought was just a simple homemade pizza. Not simple at all! I soon discovered how serious pizza making is and, to my amazement, I found it to be a science itself. You can see it for yourselves here. Yes, a forum dedicated in its entirety to this science. Any type, any style is covered. Any question, any doubt is answered. Any technique, any method is discussed. But wait, are you still thinking Math is in fact useless for you now? Not with all the calculations you'll be doing to create your own perfect pizza dough! So enjoy the adding and subtracting and have fun in studying this culinary science.

My favorite dough recipe is from Dave in Canada, or as you will find him in the forum, Canadave. He authorized me to blog about his recipe and he is the one to thank for this masterpiece! You can find the recipe here. Every step is very well explained. He also talks about the sauce, cheese and toppings. Try to read as much of the thread or the forum if you'd like to learn more. I used the forum's Lehmann calculator to make Dave's recipe equivalent to 3 13-inch dough balls with a thickness factor of 11. The amounts I used to accomplish this are as follow (please note I rounded up the decimals since my scale is not that precise and still got excellent results):

Flour (100%): 721 g (I used King Arthur Bread Flour)
Water (64%): 462 g
Instant Dry Yeast (0.78%): 5 g (I used Bread Machine Yeast)
Salt : (1.31%): 9 g (I used fine sea salt)
Oil (4.63%): 33 g (I used extra virgin olive oil)
Sugar (1.32%): 9 g

You can adjust the ingredients in the calculator according to their percentage to make a different amount/size of dough balls. Enjoy!

Thursday, January 8, 2009

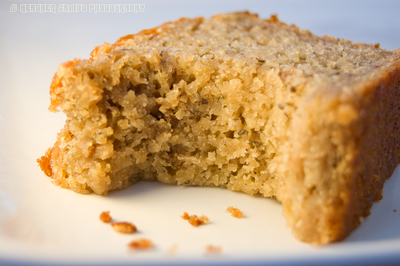
Strawberry Banana Smoothie Bread

Strawberry Banana Smoothie Bread

Baking is always a part of my weekly routine. Having two boys that lately devour instead of eat, I need to keep coming up with ways of satisfying such big appetites. Also, I'd rather give them food made from scratch with quality ingredients than processed, full-of-preservatives snacks. With nutrition in mind, I'm always thinking of ways to incorporate healthy ingredients to whatever it is I'm baking that week. It is always fun to put on your creative hat and play around with the ingredients you have in hand to come up with a much healthier version of an already good recipe. This is exactly what I did this week. I had 3 very ripe bananas on my countertop so the choice of banana bread was obvious. Now for the creative part, what could be added to it to make it at least a tad healthier? I immediately thought of the strawberries inside my freezer. Hmmm, bananas and strawberries... what else is in my fridge? And then I saw it... a small cup of vanilla yogurt. Perfect! This is how this Strawberry Banana Smoothie Bread was born! The end result? A delicious and super moist loaf of heaven.

For this recipe I followed my favorite banana bread recipe which I found on Kitchen Confit a while back. It is perfect without the tweaks I did to it so give it a try whenever you want to stick with the traditional banana bread recipe.

Strawberry Banana Smoothie Bread

Makes 1 loaf

Ingredients:

1/2 cup butter

1 cup sugar

3 very ripe bananas, mashed

1 1/4 cup fresh or frozen strawberries (thawed), pureed

2 eggs beaten

1 t vanilla

2 cups flour

1 t baking soda

1/2 t salt

1/2 cup vanilla yogurt

Directions:

Preheat oven to 325 degrees. Butter and flour a loaf pan. (I just spray mine with Pam)

Combine the flour, baking soda and salt in one bowl and set aside. Cream butter and sugar together. Add in the bananas, strawberries, eggs and vanilla. Add in the flour mixture. Add in the yogurt.

Pour mixture into the prepared loaf pan. Bake for 1 to 1 1/2 hours or when toothpick inserted in center comes out clean. Remove from oven and let rest in the pan for 15 minutes. Then remove from pan and let fully cool on a rack.

Thursday, January 1, 2009

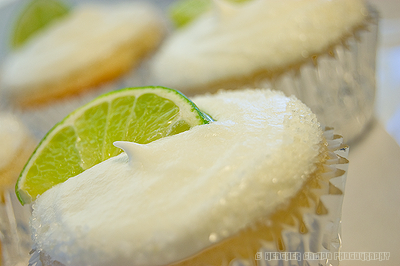
Celebrate 2009 with Margarita Cupcakes!

Happy 2009! ¡Feliz 2009!

2008 was a very peculiar year for my family. The world, as we knew it, completely changed. I still remember the day when A (my husband) called me to tell me we had to sell our house in a hurry because the company he worked at was bought. What?!?! Move again? And in a hurry? Just so you know, we have moved 6 times in the last 5 years. Crazy, I know! With moving not being a part of my 2008 new year's resolution I knew it was going to be an interesting year. As much as I would love to say we are finally settled down and everything is running as smoothly as possible, there still are a few things that need to fall into place. Hopefully, 2009 will be the year in which all of the pieces finally come together to make a wonderful puzzle! With that being said, we could not pass the opportunity to celebrate the upcoming year with friends. I made margarita cupcakes which I found on this blog. This is an awesome blog with lots of cupcake recipes I cannot wait to try! I made half the recipe without the tequila so the kids could enjoy them, too. I also did not use the vegan ingredients the recipe calls for but used regular 1% milk and butter instead. These cupcakes are delicious and you will surely impress everyone once you make them!

Margarita Cupcakes

Margarita Cupcakes

1/4 cup lime juice
1 1/2 tsp lime zest (1 lime)
1 cup soy milk, plain or vanilla (I used regular 1% milk)
1/4 cup vegetable oil
2 tsp tequila (omit it for non-alcoholic cupcakes)
1/2 tsp vanilla extract
1 cup sugar
1 1/3 cup all purpose flour
1/4 tsp baking soda
1/2 tsp baking powder
1/2 tsp salt


Preheat oven to 350F. Fill a 12-cup muffin tin with liners. In a large bowl, mix together lime juice, lime zest, soy milk, oil, tequila, vanilla and sugar. In a small bowl, mix together flour, baking soda, baking powder and salt. Add to lime mixture and stir until just combined. Divide evenly into muffin tins. Bake for 20-24 minutes, until a tester comes out clean and the cakes spring back when lightly pressed. Turn out onto a wire rack to cool completely before frosting.

Tequila Lime Frosting

1/4 cup butter or non-hydrogenated shortening, softened (I used butter)
1 tbsp soy milk (I used regular 1% milk)
3 tbsp lime juice
1 tbsp tequila (omit it for non-alcoholic cupcakes) 2+ cups confectioners’ sugar
coarse sugar and salt for “rims”

Cream together non-hydrogenated shortening, soy milk, lime juice, tequila, and 2 cups of confectioners’ sugar. Add in more sugar as needed to make frosting stiff, but spreadable. Spread on cupcakes and roll the edges in a small amount of coarse sugar and salt (poured into a small bowl, so it’s easy to direct it).